@barry
Forum Replies Created
-
AuthorPosts
-
 BarryKeymaster
“Various Degrees of Illumination”
L.E.D. SMART
Roto-Dimmer
Last Chance people. I need your help. I want to order these bad boys…
BarryKeymaster@ Ccow: We think a good value for the CLR would be perhaps 1K8 (w/most LEDs that’s very bright) while keeping the LED from blowing. Then use a 2K, 2K5, 3K or 5K trimmer to dim as much as you wish. Of course people can vary either the CLR or Trimmer values to suit there needs as long as there is enough resistance in the CLR to keep it from blowing.
I also think the fact that everything is ultimately mounted to the foot switch will make it real secure for adjusting from the outside.
Last Call:
If you have a clever name for this new board based on what it does that we choose I will send you some for FREE!
BarryKeymasterCoincidentally Bruce and I have been working out this new type of 3PDT Wiring Board which includes a Trimmer for adjusting the LED level of brightness. You can do this as a set and forget using either a Standing trimmer or Flat Mount.
If you use a Flat Mount trimmer you may drill a small screwdriver hole in the back cover of your pedal for access without even needing to open it up or if you choose the Standing trimmer you can access the trimmer in the same manner with a small drill hole through the front of the pedal (not top) but where you would kick it with your toe.
That said you don’t need to drill any holes for simple access by removing the back cover for a set and forget.
You may use either the top pf the board or the underside giving you four options in total. It is the same size as our other 3PDT Wiring board and features all of the same advanced options but includes a small “wing” for the mounting of a trimmer.
This is not to replace the Original 3PDT Wiring Board but be offered as an alternative.
What do you guys think? Oh and if you have a clever name for this based on what it does that we choose I will send you some for FREE! That said it has to fit on this small board.
BarryKeymasterVery nice build as usual. Thank you for sharing. I enjoy this compressor a lot my self. You really notice it a lot more when you turn it off than when you turn it on sometimes and i like that for a lot of things.
BTW if anyone wishes to share pedal art like above to add to my right sidebar just let me know.
BarryKeymasterUpdate:
Finished the next level including film capacitors, electrolytic capacitors, Trimmer and IC Chips in that order.Here is another image to show how everything stacks up altogether.
BarryKeymaster@ Robert: Awesome I am available for Beers whenever this whole thing blows over. I bought my Grand Funk Red album at Arborias when I was like 25 on a chance. One of the best album purchases I ever made. Oh and that is the tidiest shop area I have ever seen.
@ Wilkie, Billy & Bruce: I am available for many Beers whenever this whole thing blows over!
On 2nd thought Wilkies is the tidiest shop area I have ever seen which includes a refrigerator full of Coor’s Light
OK Back to the other yet unmentioned elephant in the room.
The name of the board is Best Ever OD – w/ 3 ICs, 8 clipping diodes, 23 resistors & 20 capacitors.
By itself the name is obviously a little pretentious without context so my question would be:
BarryKeymasterBarryKeymasterThere is info on basic switching on the Guides Page on Page 23 of our Components Guide
For SW1 start with either outer lug (doesn’t matter which) and it goes 1-2-3. Just as is if you were soldering the switch right to the board. Due to the nature of a switch orientation does not matter.
For SW2 start with either outer lug and it goes 1-2. If it helps you to visualize just clip off the unused outer lug 3 on SW2 although it isn’t necessary. The you have an SPST. Usually more affordable than buying one specific.
Here is the snippet from our Components Guide:
I hope that helps.
BarryKeymaster@ Billy I also do the same value as I go down the BOM. If I come up on 10K next then I do all the 10K and in the case of a verification build I take my time and triple check everything.
So aside from soldering styles etc.. is anybody seeing any other elephants in the room?
Update:
BarryKeymaster@ Robert – Very Cool – agreed there are a lot of ways to fish and I am glad to see people reading the forum.
For testing on a final board before release for me it is slow and one component at a time.
No other thoughts or curiosities out there?
BarryKeymasterI find it is always something.
Try soldering a new board with double vision.
BarryKeymasterNice Job! I am always glad to see someone take a build to the next level and adding a Tone TwEQ is an excellent way to do that!
BarryKeymasterNice job Billy. That is a versatile OD machine.
BarryKeymasterThanks Ray that is very interesting if not a bit of a drop on a future project 😉
@ Robert: Nothing like Python Boots to give you a little Stink Foot and inspiration for a great guitar solo.
BarryKeymaster@ CCow: I figured you would know how to check
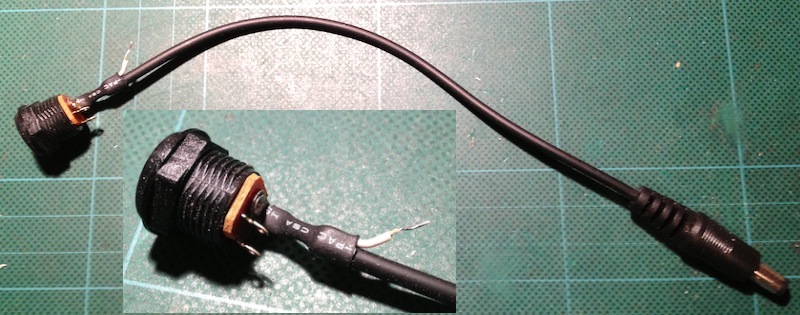
@ everyone else “not in the know” that is a very special DIY device for testing 2.1mm jacks without needing to take your pedal apart.
Just don’t forget to stick your probe in the proper hole.
Yah Stinkoot is handy.
BarryKeymasterHopefully it is simple to see above with the added Image how easy and neat wiring can be using the 3PDT wiring board.
-
AuthorPosts