@barry
Forum Replies Created
-
AuthorPosts
-
 BarryKeymaster
Tayda has a page dedicated to ordering the UV service.
https://www.taydaelectronics.com/hardware/enclosures/enclosure-uv-printing-service.html
You must read through all of that while knowing that I have already done the hard part in creating the exact printable PDF ART file that they need. Understanding that renders most of the text moot since it is already done for you. Unless of course you want to do your own art. In that case it is pretty intense because you will need knowledge of art programs to be able to proceed and they explain what they need in the link above.
Just know that the PDF Art file is ready to submit to Tayda despite the repeated warnings asking if you know what you are doing and have read the article. Also if it comes up when asked about what side of the enclosure needs drilled or UV print it is going to be the FACE.
Only use the PDF file included in the link in the build doc, or shop page.
First order an enclosure. Combos need a 1590DD. Type 1590DD into the search bar at Tayda and pick a color. Since UV is Black pick a lighter color.
Now you need to order the art service for a 1590DD if buying for the combo. (There are links for this in the instructions.)
You will also need to order the 1590DD drill service as well.
For that you need an account as well as the drill link I have already made. Once you have an account you can use the drill template link and it will take you to the Tayda Box Tool.
So you need to place a Tayda order like normal.
- Order the painted enclosure remembering that the ART uses black printing so no dark enclosures.
- Order the Drill service
- Order the UV service
After check out is complete you will need to wait 20 minutes or so..
Then you need to go back to your Taydakits dashboard to finalize the order and put the correct services you ordered to the correct job. It is this way since many people order many different jobs all at the same time.
Taydakits dashboard link: https://drill.taydakits.com/dashboard
Note on the right side of the Dashboard you can see where you can add a drill template to be saved for future and the UV print has a button to add as well.
On the right you will see where you will need to assign your drill template as well as your UV template.
Note: Some of these are my personal templates below. Yours will not look the same since I own my own Bardel pedal company. You will only have one template for each of the links you use. One for drill and one for UV. Then you will assign these to the correct painted enclosure you bought. The PDF Artwork does not have the Bardel, or GuitarPCB branding, only NostalgiTone which you are welcome to use, and sell for that matter.
Simply assign the drill template and UV template to the correct Box Job on the left.
If there is some sort of error which I have yet to experience then they will let you know. That said you can’t change your mind once you submit an order.
FYI: You will not have all the options as I did in the template photo above because I do have multiple artwork files to choose from to suit my personal needs.
You will see after a while they will start working on your project:
BarryKeymasterMy continued advice would be to re-flow the entire project as you said. It isnt always necessary to suck up the solder since often you can pick up excess solder with your iron tip and then remove it on a wire scouring pad (like a brillo). This also prevents cooling down your tip. Then just clean and repeat. It also helps to tin the tip every once in a while.
After you do all of that then make sure all of your transistors are firmly seated in the sockets before you test. A loose transistor is as bad as a cold solder joint.
If that does not solve the issue then look carefully over your entire build by color band as Billy suggest for an error in resistor value which would explain a similar gain issue as well.
Beyond that an Audio Probe is also recommended.
An Audio Probe is a fantastic tool to easily locate a problem area
BarryKeymasterI happened to find a video series on YouTube regarding Tayda and UV printing.
Note: I do not use the same art programs used. If you do your own art you will have to figure it out.
Otherwise, I have provided my PDF art on the shop pages for the NostalgiTone 60s & 70s.
Part 1
Part 2
Part 3
Part 4
BarryKeymasterFYI I also noticed for reasons I do not understand that when using my phone I am able to zoom in really well on the schematics and everything else. It is only when using the computer that things start to get blurry.
BarryKeymasterRX was added on at the end to prevent any potential noise created by rolling off the guitar volume to 0. Hence the X.
I updated that one image.
You will notice it exists in the other 2 full board images.
BarryKeymasterI have found a way to keep the PDF file from being compressed so if you download the new build doc it is a 12MB file now instead of 1MB. That allows you to zoom in better without the build document being overly large.
BarryKeymasterTayda has a page dedicated to ordering the UV service.
https://www.taydaelectronics.com/hardware/enclosures/enclosure-uv-printing-service.html
You must read through all of that while knowing that I have already done the hard part in creating the exact printable PDF ART file that they need. Understanding that renders most of the text moot since it is already done for you. Unless of course you want to do your own art. In that case it is pretty intense because you will need knowledge of art programs to be able to proceed and they explain what they need in the link above.
Just know that the PDF Art file is ready to submit to Tayda despite the repeated warnings asking if you know what you are doing and have read the article. Also if it comes up when asked about what side of the enclosure needs drilled or UV print it is going to be the FACE.
Only use the PDF file included in the link in the build doc, or shop page.
First order an enclosure. Combos need a 1590DD. Type 1590DD into the search bar at Tayda and pick a color. Since UV is Black pick a lighter color.
Now you need to order the art service for a 1590DD if buying for the combo. (There are links for this in the instructions.)
You will also need to order the 1590DD drill service as well.
For that you need an account as well as the drill link I have already made. Once you have an account you can use the drill template link and it will take you to the Tayda Box Tool.
So you need to place a Tayda order like normal.
- Order the painted enclosure remembering that the ART uses black printing so no dark enclosures.
- Order the Drill service
- Order the UV service
After check out is complete you will need to wait 20 minutes or so..
Then you need to go back to your Taydakits dashboard to finalize the order and put the correct services you ordered to the correct job. It is this way since many people order many different jobs all at the same time.
Taydakits dashboard link: https://drill.taydakits.com/dashboard
Note on the right side of the Dashboard you can see where you can add a drill template to be saved for future and the UV print has a button to add as well.
On the right you will see where you will need to assign your drill template as well as your UV template.
Note: Some of these are my personal templates below. Yours will not look the same since I own my own Bardel pedal company. You will only have one template for each of the links you use. One for drill and one for UV. Then you will assign these to the correct painted enclosure you bought. The PDF Artwork does not have the Bardel, or GuitarPCB branding, only NostalgiTone which you are welcome to use, and sell for that matter.
Simply assign the drill template and UV template to the correct Box Job on the left.
If there is some sort of error which I have yet to experience then they will let you know. That said you can’t change your mind once you submit an order.
FYI: You will not have all the options as I did in the template photo above because I do have multiple artwork files to choose from to suit my personal needs.
You will see after a while they will start working on your project:
BarryKeymasterThe file is huge for the 3 schematics together. If you are looking at just the Fuzz I would go to that build document and look at it there. The singles are the same as the combo. When saving large files into pdf they crush the png file to make it manageable.
Here is the png here for your convenience.
BarryKeymasterI received another review today from Greg Turner regarding the NostalgiTone 70s this time.
“So after building the Nostalgia 70s, it took me back. The boost is perfect, the tweed is dead on to my ears. The other remarkable thing is, all three pedals work so well with each other. Whether you boost the British or the tweed, or hit the British with the tweed, it sounds fantastic. This was a great build. I’ve built several hundred pedals and this one is towards the top. Great job you guys!”
BarryKeymasterIf it were me I would clean up all the solder joints on the back of the PCB.
Make sure you are using a cleaned, tinned, conical solder tip and make sure that the solder you are using is not too large in diameter.
While I would re-flow everything to simultaneously pull extra solder off the joint where there is too much and make sure that the solder flows into the joint. You solder joints should look like little Hershey Kiss candies. Nothing more or nothing less. If you get too much or too little you will end up with cold solder joints. I can tell you after doing support for 14 years here 80% of the time the issue is due to a cold solder joint.
Here are two areas of the PCB that have me especially concerned.
I am not sure if this will help but it shows what I mean by conical tip and proper solder diameter.
And one last thing is regarding shorting out the back of the PCB inside the enclosure. I do not see in your photo any kind of protection since you are not using right angle pots to mount the PCB safely to the enclosure. That may not be the case but I thought I would mention it.
BarryKeymasterHere is another NostalgiTone 70s “Tweed” style video demo.
There are a lot of powerful clean tones with the Tweed circuit as well. Probably my next video.
BarryKeymasterLooks like you have a solder bridge going on here:
The only other suggestion I have would be to use your DMM in continuity mode and test for common grounding to everything.
BarryKeymasterHi Bruno,
Thank you for sharing!
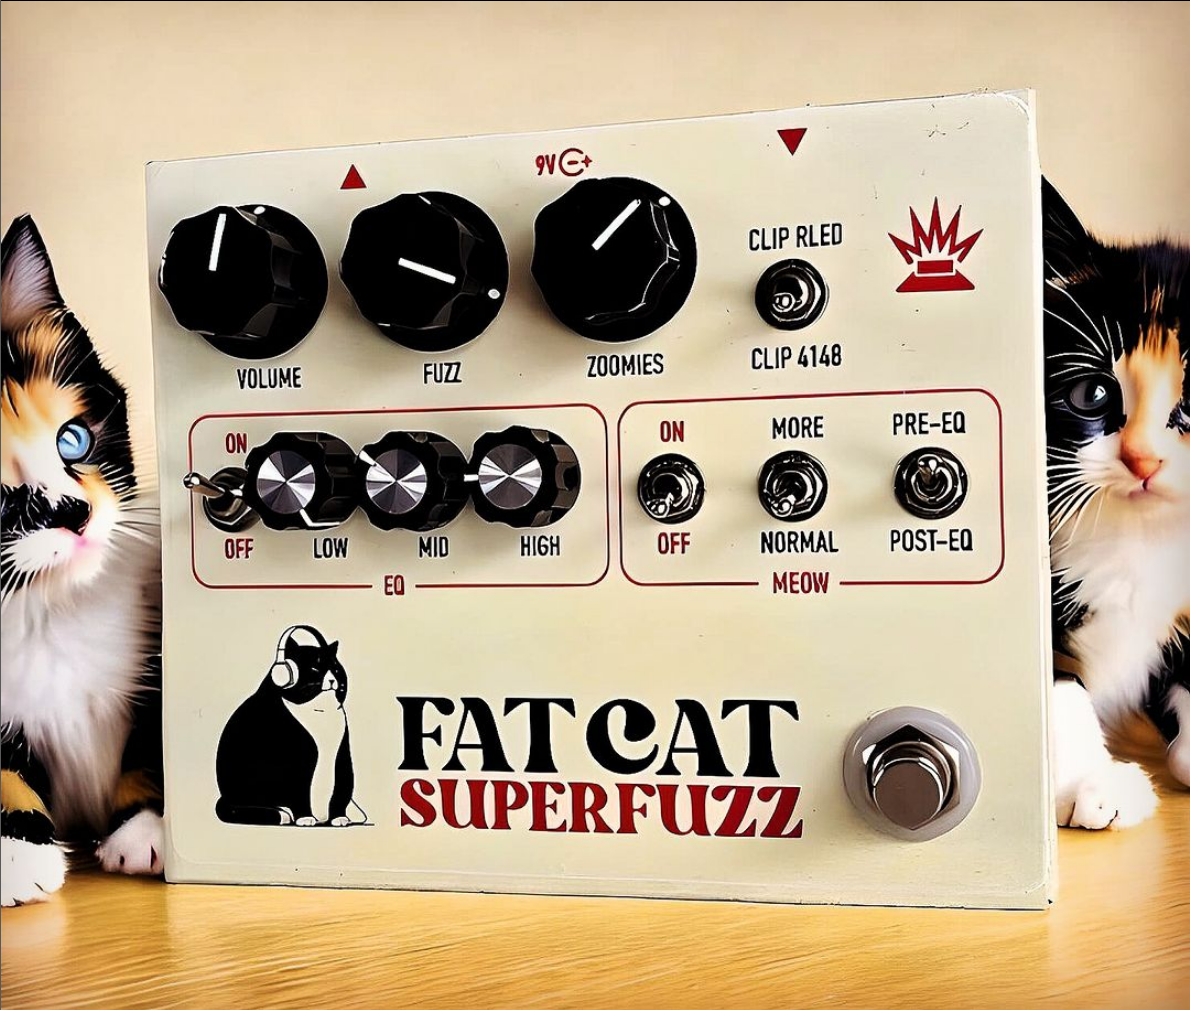
That looks amazing and I am sure it sounds fantastic. One of my favorite and under-appreciated circuits being the Fat Cat Fuzz. Adding the Tone TwEQ, and Emerald Ring sounds like a real winner as well as the additional mods.
If you want to expand on additional mods for other folks, feel free.
Keep the photos coming people so I can have some fun promoting them on Facebook, Threads, and Instagram.
FYI: I need nice, high res photos of GuitarPCB builds like the one in this post.
I can’t make thumbnail size photos work.
BarryKeymasterYou need to put the LED cathode lead in the (Non-white) open pad. The white pad is for a bi-color lead.
Easy fix.
BarryKeymasterExcellent!
Thank you for sharing.
It is a very stable, as well as versatile Fuzz. Super easy to include in a modern rig.
BarryKeymasterI can just advise you to try different things. It is all very subjective on a lot of criteria.
BarryKeymasterThe BlueBuster is based on the Bluesbreaker amp. It is meant to have the master volume cranked. You can pretty much read about this regarding any Bluesbreaker style pedal. That said there are a few things you can do to increase the volume even higher above unity. You can add a gain stage like the Afterblaster onto the foot switch. You can simply change the clipping diodes to LEDs or you can double up on the silicon diodes increasing the forward voltage. Either way cranking the Volume is part of the excellent tone.
As for the Muff circuit the Volume drop could be apparent since it features a fairly severe mid-scoop, while the Blues Buster has a mid-hump. It is hard for me to say without hearing it in person but I would try other pedals.
-
AuthorPosts